Smaller mirrors aluminizing procedure (chamber in the 1.5m dome)
Mirror washing: see 4m procedure.
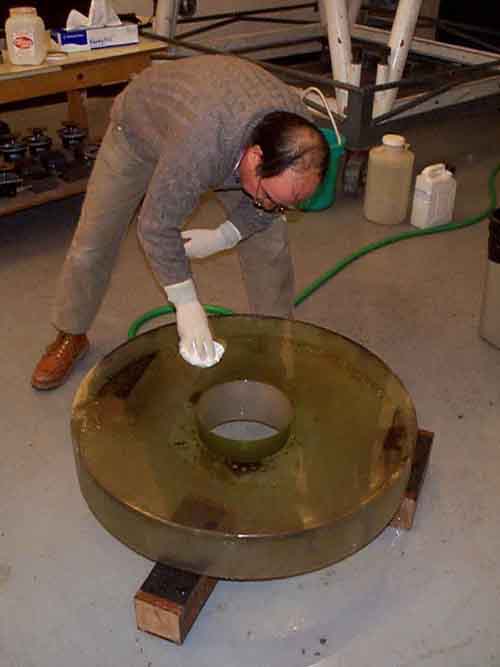
See picture of the mirror after sitting 2 years in the tube without any cleaning and a picture of the washing (aluminium removal with acid).
Note: units used are : 1.3x10⁻⁶ atm = 1 micron (Hg) = 1 millitorr (=0.13 Pa)
We indicate the elapsed time for the aluminizing (rather slow in this example, the entire process could last as little as 3h00).
A.1. Check general cleanliness of chamber and put a roll of paper on the bottom of the chamber to step inside without leaving dirt.
A.2. Replace all the damaged filaments (there are 24 of them on a single diameter): they must be straight when loose (i.e. unstressed), not covered with aluminium (drops). See picture of this operation inside the chamber. Press gently the filaments with the fingers : if they are stressed, they break immediately. Filaments can usually be used for 2-3 aluminizings.
A.3. Prepare 96 aluminium clips and wash them in acetone. Hang 4 clips per filament : one on each loop.
A.4. Check the chamber Orings (clean and lubricate)
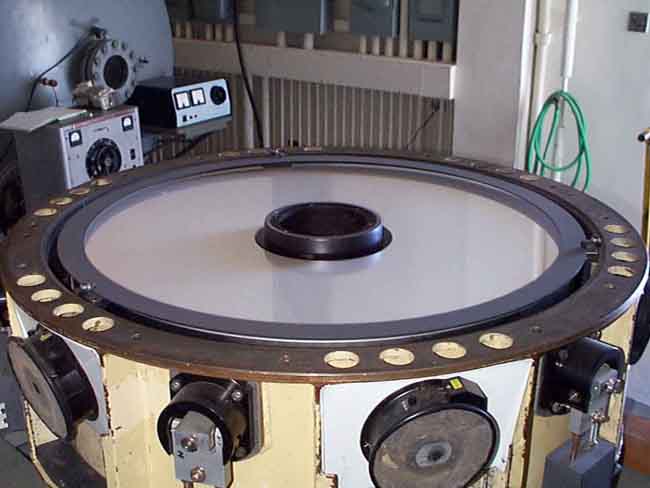
A.5. Setup mirror in aluminizing tank (picture). Blow off dust with dry nitrogen. Seal tank.
B.1. 0 min: Connect black and orange power cables (filaments and glow discharge).
B.2. Take the extremity of the black flexible water pipe outside the dome
B.3. Open the water circuit valve (green pipe)
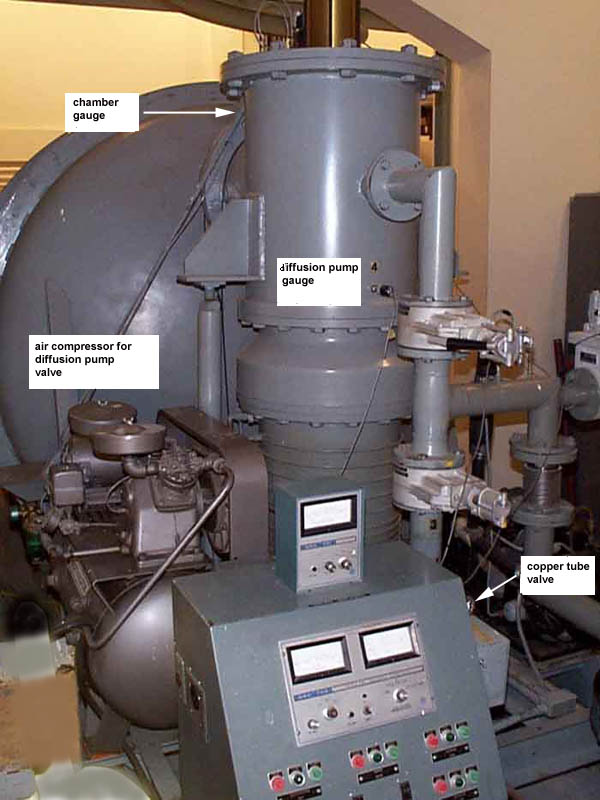
B.4. Close the copper tube valve (water to diffuser) on the right side of the control panel
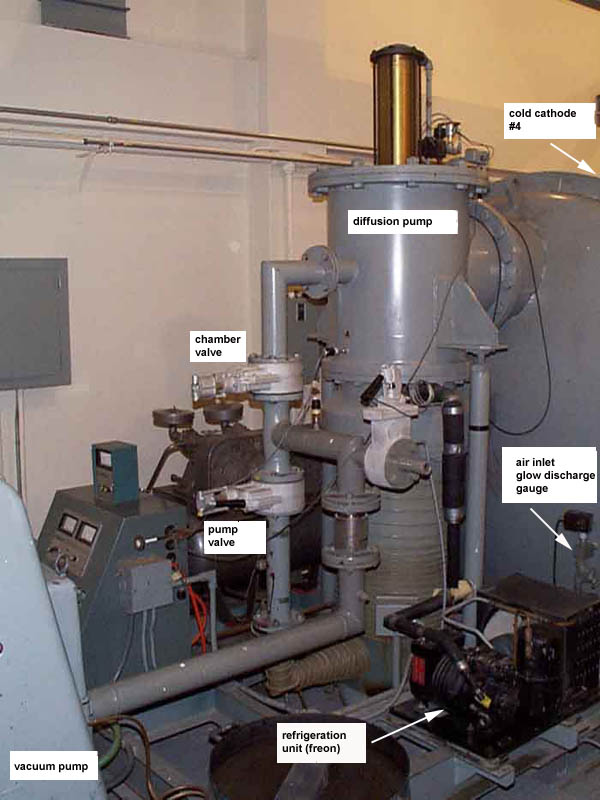
B.5. See all following elements described on picture 1. Connect the tank vacuum gauge. Close both valves (diffuser and tank): the handle of the tank (top valve) should be on the left side and the handle of the diffuser (bottom valve) should be on the right side.
B.6. Picture 2. Turn on the air compressor: it must show 100 lbs to be able to open/close the diffuser valve. Make sure the voltage wheels for glow discharge and filaments are at 0.
B.7 Turn on the roughing pump and watch the diffuser vacuum gauge (on top of control panel). After 2 min, open the diffuser valve and watch the vacuum gauge.
B.8. When diffuser gets to 5 microns, close diffuser valve and open tank valve. Some smoke is generated for a few minutes: close the doors and turn on the room air extractor.
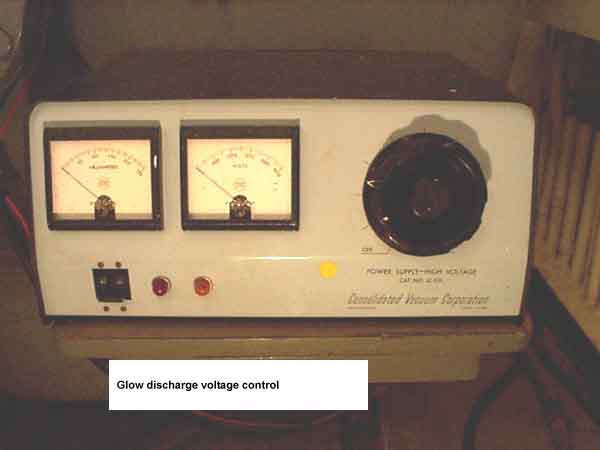
B.9. 25 min: When tank vacuum reads 200 microns, turn on both power knobs on the control panel to start the glow discharge. Raise voltage to 1000-1500V (picture) for 5 min and check the ionization color in the tank (watch for arcs). The vacuum should drop below 30 microns. Decrease to zero the voltage and turn off the glow discharge power knobs.
B.10. 1h35min: When tank is at 5 microns, close the 2 valves and open the poppet valve (through diffuser valve) by switching on the appropriate knob (this makes a loud noise, don't panic). Turn on the diffuser, the refrigeration and open the copper tube water inlet. Turn off the vacuum gauge and turn on the cold cathode (#4).
B.11. Open the diffuser valve (starts pumping the tank through the diffuser).
B.12. 3h50min: the tank reaches 4x10⁻⁵. Turn on the filaments power.
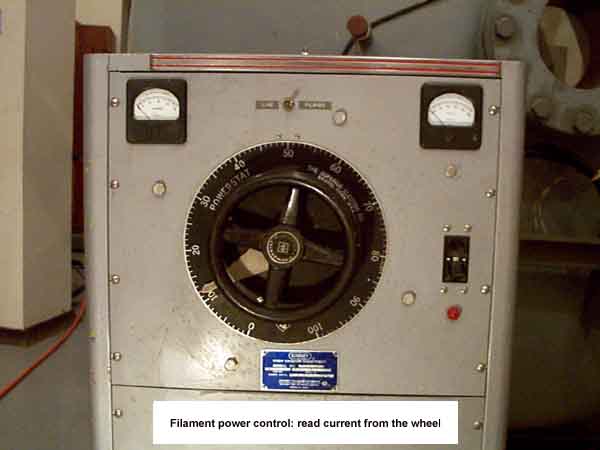
B.13. Always reading the values of the current on the wheel (picture), raise to 35A and check for 5 min until the filaments color is uniform.
B.14. Raise to 45A for 1 min, then to 55A for 5 min: you should see the aluminium melt on the filaments (the filaments darken, then redden again). The aluminizing process is initiated and you should see the mirror reflect light.
B.15. Raise to 65A for 2 min: all clips should be melted and the filaments of a uniform color. Raise to 85A for 30 sec then 90A for 20 sec. Decrease the power down to 0 in 10 sec.
B.16. Close the poppet valve (knob), and turn off the compressor. Disconnect the gauges (#4 and the one at the back), turn off the cathode.
B.17. Open a little the air inlet valve to the tank (with a piece of cloth on the pipe entrance). When the cooling water is cool again, close the diffuser valve, turn off the roughing pump, the refrigeration and close the main water valve on the wall (leave the copper tube opened).
B.18. It will take a minimum of 30 minutes for the tank to be at atmospheric pressure and open it.
B.19. Inspect carefully the coating and look for water marks. Do the adhesive tape test on the edge of the mirror to check the quality of the coating. Measure the reflected and scattered light in 2 different places to compare with data before aluminizing.
Total: 4h30min.